Finishing off the corners of your projects neatly can give your projects a really professional look. It might be a napkin set, table cloth, an apron or on a piece of clothing. It can be tricky though if you've not done it before.
This is how I have worked out how to do it after a bit of trial and error. It can be a bit time consuming but I think it is worth it.
First of all fold and iron down just under 1cm all the way round the edge. Make sure you check what the right side of the fabric is and fold in towards the wrong side....
Then fold and iron down again....
With right sides together, fold each corner and pin like so...
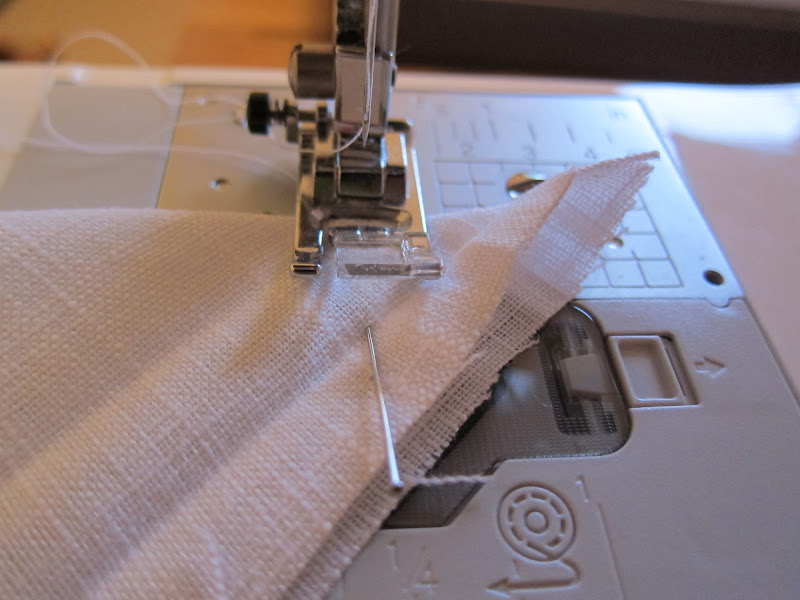
You can just about see the creases where you ironed the folds. Starting at the folded edge, sew at a 90 degree angle. Use a pin to help guide you....
This bit is important, only sew between the two crease lines, DON'T sew right to the edge! Also make sure you use the reverse stitching function on your machine to make sure the stitches don't come loose.
Next trim off the corner about 0.5cm from your stitching line.....
Then turn inwards to hide the seamed edge....
Then fold inwards to hide all raw edges and pin down. Obviously repeat on all corners before finishing off.
Then finally stitch all the way round wrong side face up and there you have it! Neat mitre corners with no raw edges!
Now you can make all your projects look great round the edges.


Wow that looks lovely and neat Lauren...ive not had the need for this yet but will do im sure!:}
ReplyDeleteLove this tutorial... thanks sooo much for sharing! I think this method of mitering corners is easier and faster... thanks again!
ReplyDelete