Transforming a cheap charity shop find into an amazing unique piece of furniture is hugely satisfying. I love to make something old into something new. A few years ago I learned to how re-upholster chairs and caught the bug of furniture revamp. Here are a few of my past projects - before and after....
Upholstery can be quite technical at times. The dining chair that I revamped (pictured above) was completed using traditional techniques - right down to re-using the original horse hair for a firm but comfortable base! But furniture revamp doesn't need to be difficult. A lick of paint and and a block of sand paper can give a rustic look. A few months ago I found an old chair on the street and dolled it up over a weekend...
It's been a while since I've put my painting clothes on and a few weeks ago I found this little bedside table for only £5 in a local charity shop! I had been inspired by the vintage and antique shops I had visited in Buenos Aires at the beginning of the year and couldn't wait to get started on it.
I loved the little rose door knob too!
 |
It got a couple of coats of white primer first..... |
 |
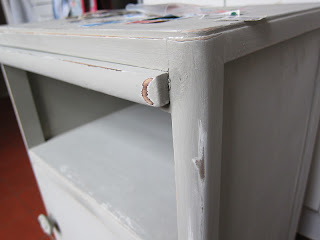
I used Annie Sloan chalk pain and then took a bit of sand paper to the corners and edges for a rustic and worn look. |
 |
I then looked out my old stamp collection from my childhood - yeah I was a cool kid! I used to be in the royal mail stamp club and they would send you all sorts of stuff. I had a whole stash of colourful stamps from all over the world. Who knew they would be so useful?!
So I laid out the order of all the stamps....
Then stuck them all down with decoupage glue....
And here is the finished cabinet....
I added a little gold leaf around the rim too...
A close up of some of my favourite stamps. The decoupage glue and varnish give a lovely smooth finish that's water repellant too.
And thats how you get from shabby to chic in the world of furniture revamp!


