It should be a fun packed day with various things going on from corn hole-ing, noodle station, decorate your own cupcake, BBQ, live music (still to be confirmed) and a craft workshops. I've been delegated craft area - which will be known as 'The Craft Shack'. So my plan is to have a knit your own flower brooch workshop and a jewellery making workshop.
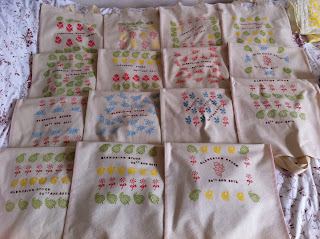
I've also been busy all weekend making 17 souvenir tote shopping bags which will be sold for charity. It's been fun but I was getting a bit tired towards the end.
If you fancy trying something out similar yourself its easy once you get in the flow - here is how I did it.....
Materials and equipment
calico
bias binding
cotton woven bag handles
thread
block printing things (fabric paint, wooden block prints, sponges)
sewing machine
scissors
First of all I prepared all the materials, cut bags out to size, your choice of size really, I modelled it on another bag I had which is 32x41cm when finished so you need to add on a bit of seam allowance.
To minimise fabric wastage I took the width of the fabric and quartered in, that way I didn't have any left over.
 |
| My work station, ready to print my designs |
Next put your design on the bag. I used wooden block prints with fabric paint. It takes a bit of practice to sponge the paint evenly on the stamp so have a rag close by for practice dabbing.
Really the possibilities are endless though....applique....machine embroidery...whatever you fancy.
Next I pinned the bag, right sides together and stiched up the sides, right to the top.
Next I stitched on bias binding to hide the raw edges. Choose whatever colour or style you want. As I was making a lot of bags and I wanted to keep costs down I just bought cheap stuff. This is a great tutorial to make your own bias tape, which means you can incorporate some of your fav fabric into the bags!
The quick way I found was to fold the tape and just hold it in place then put it under the foot of your machine to hold it. Then stitch away and just keep ensuring it stays in line right to the bottom. I wasn't sure if this would work at first but I managed just fine and it saved loads of time pinning first.
Next I ironed down the top, just 1cm or so first then about 3 cm.
Next up to stitch the handles on..I used 80 lengths of handles but you could use whatever length you wanted depending on how you were going to use the bag. I tucked the end under the lip I had created to hide raw edges then pinned it in place.
Using one continuous line of machining I went round the bottom of the lip I had ironed and to secure the handles stitched a square with a cross in the middle. Just make sure your needle stays in the fabric, lift up the foot and swivel your fabric round to change direction.
And repeat as many time are you want, in my case 17!


No comments:
Post a Comment